
THIS GUIDE IS AVAILABLE IN .PDF HERE WITH A BETTER PAGE LAYOUT (Bold and Italic things…Easier to read) : https://drive.google.com/file/d/108MTjMP4WwQwyaNzE66WdUE3dakNTjUj/view?usp=sharing
Crafting your first weapon and armor.
In this guide, we will learn to craft a Basic Baton C, (which is equivalent to a Club in classic NWN) and a Basic Leather Tunic (equivalent to a Light Armor).
To craft something, your first have to know its blueprint.
That blueprint is available once you unlocked the corresponding Perk in your Rest Menu.
Since the Basic Baton C is one of the most simple weapons you can build, the blueprint is unlocked at 1st level of the weapons blueprint Perk.
As you advance in levels, you will unlock more weapons blueprints to craft more efficient/complex weapons.
Once you know the blueprint of a craft, you will need to use the proper device to craft it.
To craft weapons, you will use a Weaponsmith bench. To craft armors, you will use an Armorsmith bench. Mods for equipments are crafted from an Engineering bench, and base parts from a Fabrication Terminal.
Each craft needs components. There are always a few main components needed, sometimes secondary and tertiary.
Depending on the difficulty level of a craft, your chances of success are linked with the skill level you have corresponding to that craft category.
The difficulty level of a craft is also depending of the components you use.
Mynock Meat, Wood and Kath Hound tooth are all organic material.
You could use any of these to craft a small handle, but Mynock meat or wood are easier to use than a Kath Hound tooth and it will then be easier for you to craft a small handle with Mynock Meat than with a Kath Hound Tooth, especially if your skills are low.
The condition of a component also increases the difficulty level of a craft. A destroyed component is easier to handle than a ruined one, which is easier to handle than a flawed one…Because as the condition or the tier of a component is higher, it also increases the difficulty level of the craft.
You can look at the level of a component by examining it in your inventory.
If the difficulty of a craft is listed as « impossible », don’t even try it.
As long as the difficulty is not listed as impossible, you will succeed in a craft but you might not get all of the item properties added to the final item.
Always try different components for the same blueprint to see how it affects the crafting level difficulty.

When the blueprint difficulty is marked as "Trivial" you have a 90% base chance of succeeding on each item property.
As crafting weapons use the Weaponsmith skill, the more points you will have in that skill, the more chances you will have to succeed in crafting weapons with all their properties.
To craft a Basic Baton C, you need at least 1 Wood baton frame and 1 small handle.

Those are the main and secondary components.
You can use up to 2 wood baton frames and 2 small handles to craft a more efficient weapon, but it will also increase the difficulty of the craft, so we’ll start with only one of each.
To craft a Wood baton frame, you will need at least 2 organic material .
You can use up to 4 organic material to get a more efficient frame.
To craft a small handle, you will need 2 organic material.
Step-by-step craft :
1. Buying the right Perks
As said above, to craft something, you have to know the right blueprint.
Open your Rest Menu (F1), select View perks , then Buy Perks .
Go to the Weaponsmith section, then Weapon blueprints and buy the lvl 1 Perk.
You just unlocked the blueprints of a few basic weapons.
Go back to the Buy Perks section, then to the Armorsmith section, then select Armor blueprints and buy the lvl 1 Perk.
You just unlocked the blueprints of a few basic armors.
2. Harvesting
Now that we learnt the right blueprints, we need to harvest or scavenge some resources to be able to craft what we want.
Resources can be found in wild and underground areas (wood, raw ores…), on animal bodies (furs, tooths…), given or bought from NPC’s and found in random crates or junkpiles (scrap metal).
To get resources from trees, crystal clusters or ore veins, you need to harvest them. You need a Resource harvester to harvest and your efficiency in harvesting is linked to your harvesting skill .When you search a junk pile, you instead use your scavenging skill and it doesn’t require any tool.
You can buy a Resource harvester and a Resource scanner from Darryn Beto, in the Fab Lab, North of CZ-220 tutorial area.

On CZ220, your best hope to get organic components is to kill some Mynocks in the Maintenance level, to get Mynock Meat.
Once you have at least 4 Mynock Meat, go back to north area of CZ-220 to find a weaponsmith bench.
If you have some doubt on the type of a component you harvested, just use examine on it in your inventory.
3) Crafting
Use a Weaponsmith bench, and choose the wood baton frame blueprint in components section.
Put the components needed (2 organic material) into the Weaponsmith bench inventory. Take back the confirm components item in your inventory and choose create item in the menu.
You should now have a wood baton frame. Of course, you loose all the organic material units used for crafting that component during the process.
Use the Weaponsmith bench again and choose the small handle blueprint in components section.
Put the components needed (2 organic material) into the Weaponsmith bench inventory. Take back the confirm components item in your inventory and choose create item in the menu.
You should now have a small handle.
Use the Weaponsmith bench, choose the Basic Baton C blueprint from the weapons section.
Put the components (wood baton frame and small handle) needed into the Weaponsmith bench inventory.
Note that you should put main, secondary (and tertiary for some blueprints) components separately.
If you succeeded, you now have your Basic Baton C !
It is important to notice that in SWLOR, crafted equipments are almost always better than those you can buy from merchants. So players are really encouraged to craft as much as they can.
Now that you know how to craft something, building your Basic Leather Tunic will be faster. This craft is different, as there is one more crafting step than for the Basic Baton C.
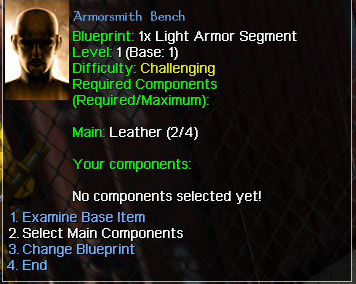
To build the Tunic, you will need at least 1 light armor core and 1 light armor segment (and up to 2 of them, but again, we’ll go with only one of each at first, to be able to succeed in the craft).
You will craft those components from an Armorsmith bench after selecting their blueprints in the components section, then assemble the components to build your armor.

To craft the light armor core, you will first need to craft a padding, which can be made from the destroyed fiberplast you scavenge in junkpiles of CZ220.
You will need 3 destroyed fiberplast to craft a fiberplast padding.
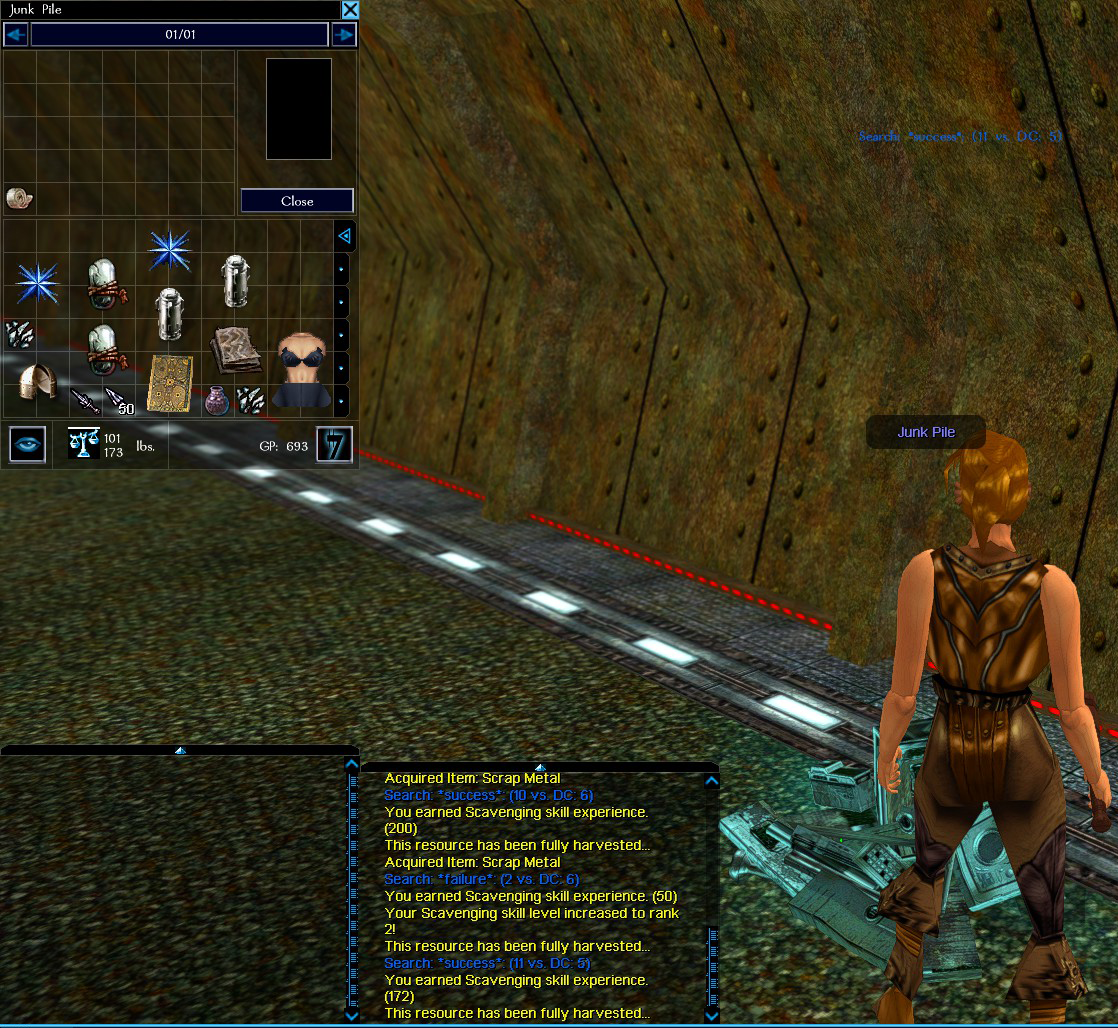
A player character successfully scavenging a Junk Pile and finding a destroyed fiberplast.
It is important to only use destroyed fiberplast and not flawed or ruined fiberplast, since it will be too hard for you to craft on early skill levels.

Once the padding is crafted, use it as main component to craft the light armor core.
Then use the destroyed leather you may have found on the Mynocks of the maintenance level to craft the light armor segment. You will need 2 destroyed leather.
Once those components are crafted, assemble the main and secondary to craft your Basic Leather Tunic.

4) Improve your skills
By crafting these 2 equipments, your armorsmith and weaponsmith skills should have improved.
You can also craft a small shield, light boots or a finesse vibroblade as a beginner, to get more experience.
Finesse vibroblade are especially interesting to craft to improve your skills as it only requires 1 metal and 2 organic material.
You may have to craft a few basic things, again and again, to improve your skills before being able to craft complex and interesting equipments, and being able to use higher level components.
5) Enhancements and mods (Section under contruction)
Each craft, depending on its level and difficulty, has 1 or more Enhancement slots.
After you built an item, you can improve it by adding Mods.
Each item has a number of available mods slots, depending of its level.
Mods are crafted or obtained from NPC’s, don’t underestimate their efficiency and usefulness !